Long time ago (a few months I guess) I asked you on Instagram what kind of pattern you would like to receive from me. A pattern, that would be FREE.
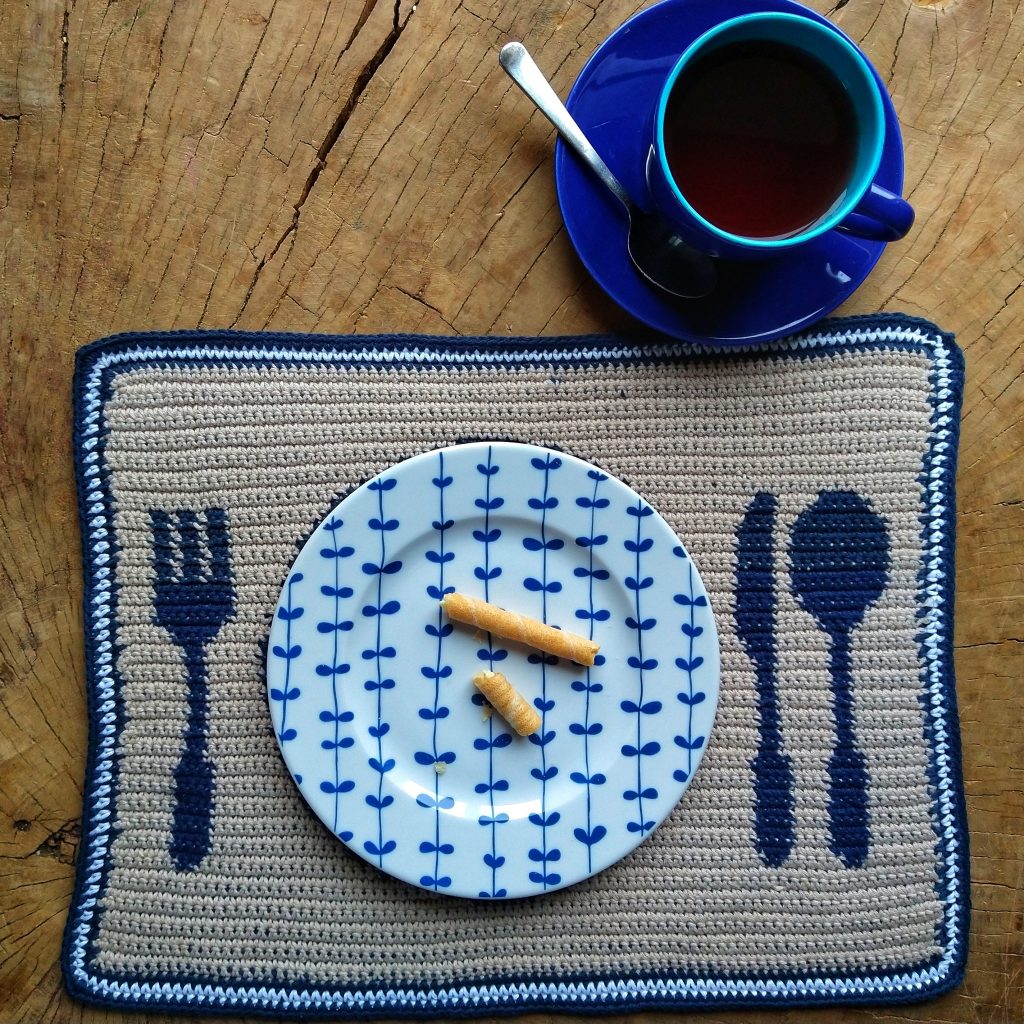
Yvonne, who is an amazing crocheter herself, proposed a placemat. I liked the idea and I am sorry it took so long to prepare (you know, life is life, and life in pandemic is a different story). But finally please welcome Basic Cutlery Placemat!
Purchase printable PDF on Etsy HERE or on LoveCrafts HERE.
Add this pattern to your Ravelry account HERE.
Pin it for later HERE.
Explanation
Decorate your table with these modest yet elegant placemats for each family member. Profit from the fact that your kids can lay the table properly without your help, just because there’s a hint on the placemat!
Supplies
-US D-3 (3 mm) crochet hook
-Yarn: Drops Safran, 100% cotton, 5 ply/sport, 1 skein has 160 m / 175 yds in 50 g / 1.8 oz
- color A: light beige 64 – 1 skein
- color B: navy blue 09 – 1 skein
- color C: white 17 – about 5 m / 5yds
-Scissors
-Yarn needle
Gauge
10×10 cm/4”x4”=22 sc x 24 rows
Finished Size
30×40 cm/12”x16”
Abbreviations (in US terms)
ch – chain
sc – single crochet
rep – repeat
rnd – round
RS – right side
sl st – slip stitch
WS – wrong side
yo – yarn over
Notes
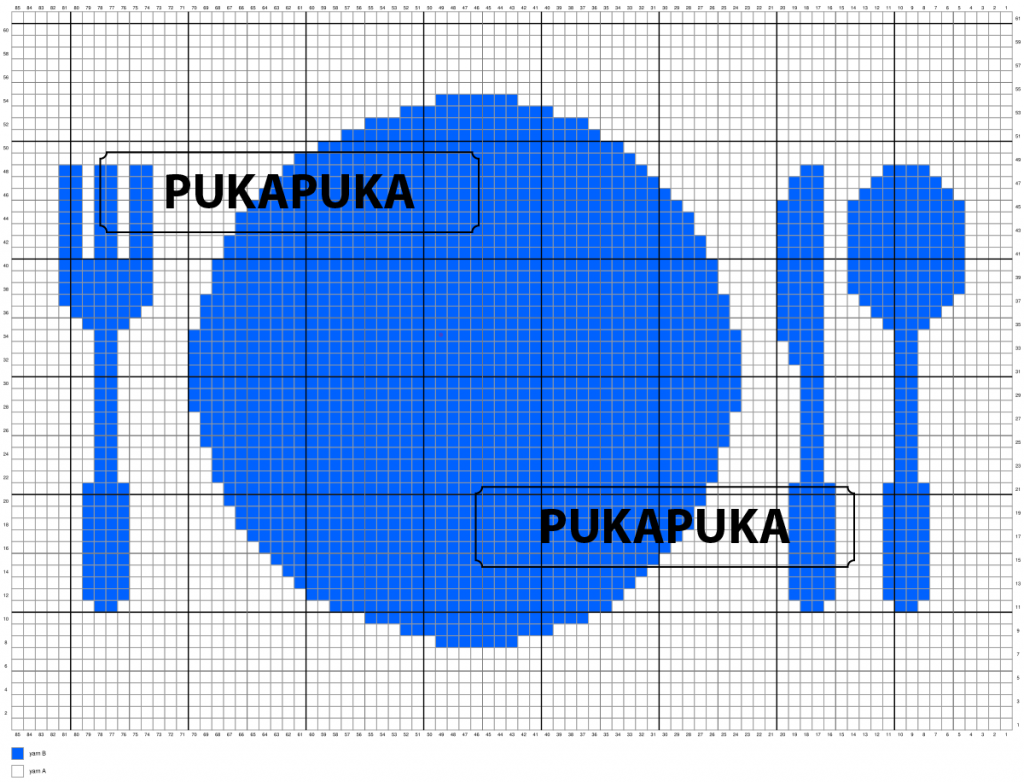
- The placemat is crocheted using single crochet stitches and tapestry technique throughout.
- Tapestry technique requires working with two strands of yarn at a time and allows changing colors when needed: crochet over the color that is not is use to hide it. When next stitch is marked as a different color on the graph or written pattern, make the last yarn over of current stitch with new color and continue with new color, crocheting over previous color. (HERE you can find help with crochet colorwork. Dawn has explained it in details!)
- Crochet down top, back and forth in rows. Each row counts 85 sc.
- End each row with ch1, that does not count as a stitch, then turn your work and proceed with the next row.
- Use written pattern or graph, that show number of stitches in each color.
- When the main part (shown on the graph) is finished, add a frame, working sc in rounds.
How to read written pattern:
← Row 7 [RS]: A25, B15, A35
- Arrow indicates direction of row.
- RS means you work on the right side.
- Letter indicates which color of yarn to use.
- Number indicates how many sc of each color to work. Therefore, for this example, you’ll work 25sc in color A, 15sc in color B, 35sc in color A. Then ch1, turn your work and proceed with Row 8.
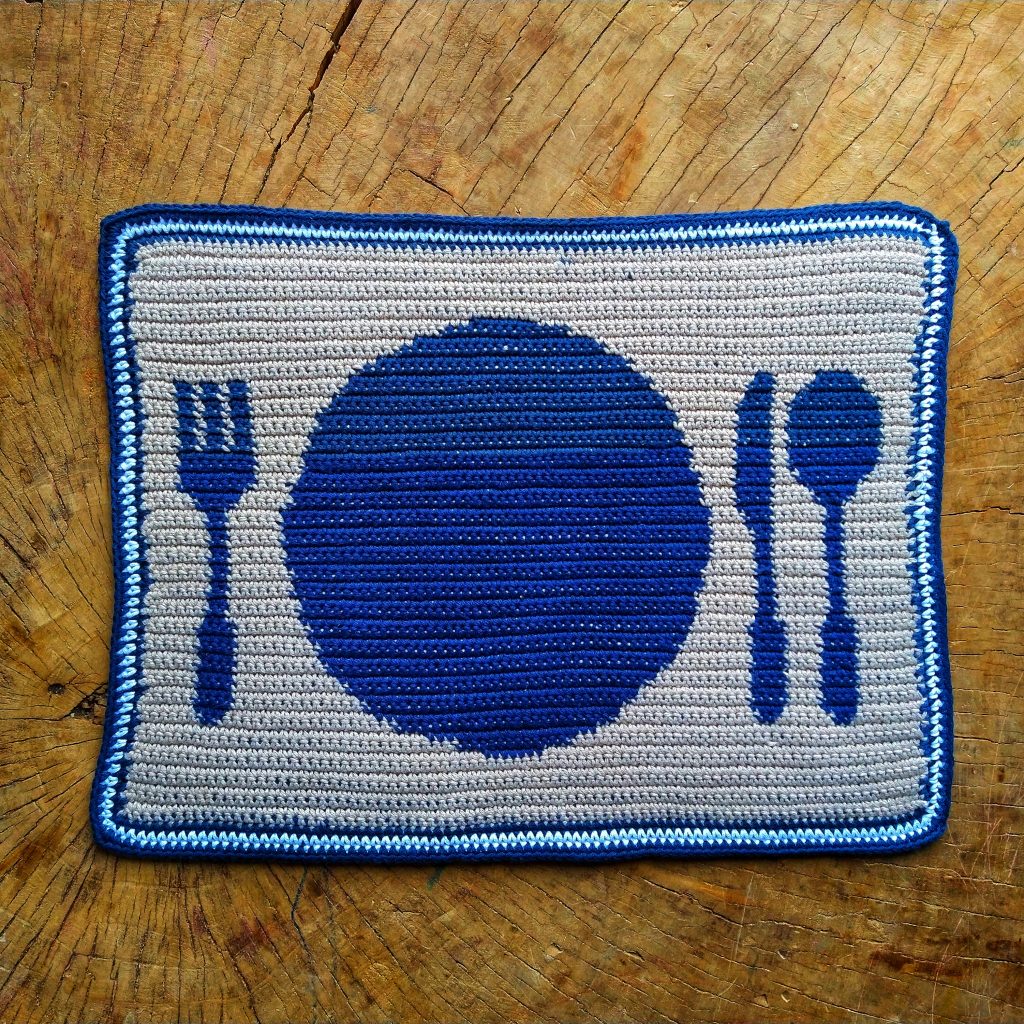
If you prefer, use the graph (below), each square represents 1sc.
See map variation of the pattern HERE.
Pattern
The main part of the placemat
(worked back and forth in rows)
Using yarn A, ch86.
← Row 1 [RS]: (Take yarn B and crochet over it to hide it until it shows up in Row 8) 1sc in 2nd ch from hook; sc across, (ch1, turn. 85sc: here and throughout)
Rows 2-7: A85
→ Row 8 [WS]: A36, B7, A42
← Row 9 [RS]: A39, B13, A33
→ Row 10 [WS]: A30, B19, A36
← Row 11 [RS]: A8, B2, A6, B2, A16, B24, A18, B2, A7
→ Row 12 [WS]: A6, B4, A15, B27, A14, B4, A4, B4, A7
← Row 13 [RS]: A7, B4, A4, B4, A13, B29, A14, B4, A6
→ Row 14 [WS]: A6, B4, A13, B31, A12, B4, A4, B4, A7
← Row 15 [RS]: A7, B4, A4, B4, A11, B33, A12, B4, A6
→ Row 16 [WS]: A6, B4, A11, B35, A10, B4, A4, B4, A7
← Row 17 [RS]: A7, B4, A4, B4, A9, B37, A10, B4, A6
→ Row 18 [WS]: A6, B4, A9, B39, A8, B4, A4, B4, A7
← Row 19 [RS]: A7, B4, A4, B4, A8, B39, A9, B4, A6
→ Row 20 [WS]: A6, B4, A8, B41, A7, B4, A4, B4, A7
← Row 21 [RS]: A7, B4, A4, B4, A7, B41, A8, B4, A6
→ Row 22 [WS]: A7, B2, A8, B43, A7, B2, A6, B2, A8
← Row 23 [RS]: A8, B2, A6, B2, A7, B43, A8, B2, A7
→ Row 24 [WS]: A7, B2, A8, B43, A7, B2, A6, B2, A8
← Row 25 [RS]: A8, B2, A6, B2, A6, B45, A7, B2, A7
→ Row 26 [WS]: A7, B2, A7, B45, A6, B2, A6, B2, A8
← Row 27 [RS]: A8, B2, A6, B2, A6, B45, A7, B2, A7
→ Row 28 [WS]: A7, B2, A6, B47, A5, B2, A6, B2, A8
← Row 29 [RS]: A8, B2, A6, B2, A5, B47, A6, B2, A7
→ Row 30 [WS]: A7, B2, A6, B47, A5, B2, A6, B2, A8
← Row 31 [RS]: A8, B2, A6, B2, A5, B47, A6, B2, A7
→ Row 32 [WS]: A7, B2, A6, B47, A4, B3, A6, B2, A8
← Row 33 [RS]: A8, B2, A6, B3, A4, B47, A6, B2, A7
→ Row 34 [WS]: A7, B2, A6, B47, A3, B4, A6, B2, A8
← Row 35 [RS]: A7, B4, A5, B4, A4, B45, A6, B4, A6
→ Row 36 [WS]: A5, B6, A5, B45, A4, B4, A4, B6, A6
← Row 37 [RS]: A5, B8, A3, B4, A4, B45, A4, B8, A4
→ Row 38 [WS]: A4, B8, A5, B43, A5, B4, A2, B10, A4
← Row 39 [RS]: A4, B10, A2, B4, A5, B43, A5, B8, A4
→ Row 40 [WS]: A4, B8, A5, B43, A5, B4, A2, B10, A4
← Row 41 [RS]: A4, B10, A2, B4, A6, B41, A6, B2, A1, B2, A1, B2, A4
→ Row 42 [WS]: A4, B2, A1, B2, A1, B2, A6, B41, A6, B4, A2, B10, A4
← Row 43 [RS]: A4, B10, A2, B4, A7, B39, A7, B2, A1, B2, A1, B2, A4
→ Row 44 [WS]: A4, B2, A1, B2, A1, B2, A7, B39, A7, B4, A2, B10, A4
← Row 45 [RS]: A4, B10, A2, B4, A8, B37, A8, B2, A1, B2, A1, B2, A4
→ Row 46 [WS]: A4, B2, A1, B2, A1, B2, A9, B35, A10, B3, A3, B8, A5
← Row 47 [RS]: A6, B6, A4, B3, A11, B33, A10, B2, A1, B2, A1, B2, A4
→ Row 48 [WS]: A4, B2, A1, B2, A1, B2, A11, B31, A13, B2, A5, B4, A7
← Row 49 [RS]: A32, B29, A24
→ Row 50 [WS]: A26, B26, A33
← Row 51 [RS]: A35, B22, A28
→ Row 52 [WS]: A30, B19, A36
← Row 53 [RS]: A39, B13, A33
→ Row 54 [WS]: A36, B7, A42
← Rows 55-61: A85
Now the main part of the placemat is finished, from now on you will be working in rounds on the RS until the end. Do not cut any of the yarns.
The Frame
(Worked in rounds.)
Start an the top left corner (where you’ve just finished the last row of the main part).
When making the first round, think in the first place of a nice flat border. You want to avoid both undulating (when there are too many stitches) and curling (when there are too few stitches). How it turns out in the end depends on your individual tension. After frogging the first round several times I found out, that in my case I have a flat border when skipping every fourth row end, while working on the placemat left/right edge, and that is what I described below. If you notice that your placemat edge is undulating, try skipping every third row end. If your placemat is curling, try skipping every fifth row end.
Once you have the right tension in the first round, you don’t have to worry about rnd 2 and 3, just sc in every sc, as described below.
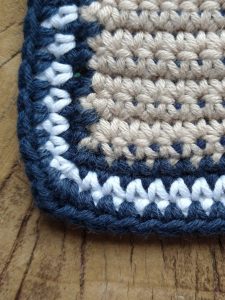
Rnd 1: Start with yarn B at the top left corner, ch1 (does not count as a st), *sc in each of the three row ends, skip one row end*, rep *-* until you reach the corner, 3 sc in the corner. Continue along the foundation chain, 1sc in each ch, 3 sc in the corner. Next: *sc in each of the three row ends, skip one row end*, rep *-* until you reach the corner, 3 sc in the corner. Sc along the top edge, 3sc in the corner, sl st to ch1 from the beginning of the rnd.
Rnd 2: Join yarn C, ch1, sc in each sc of the previous rnd, 3 sc in each corner. Sl st to ch1 from the beginning of the rnd.
Rnd 3: Rep rnd 2, but with yarn B.
Fasten off, weave in ends.
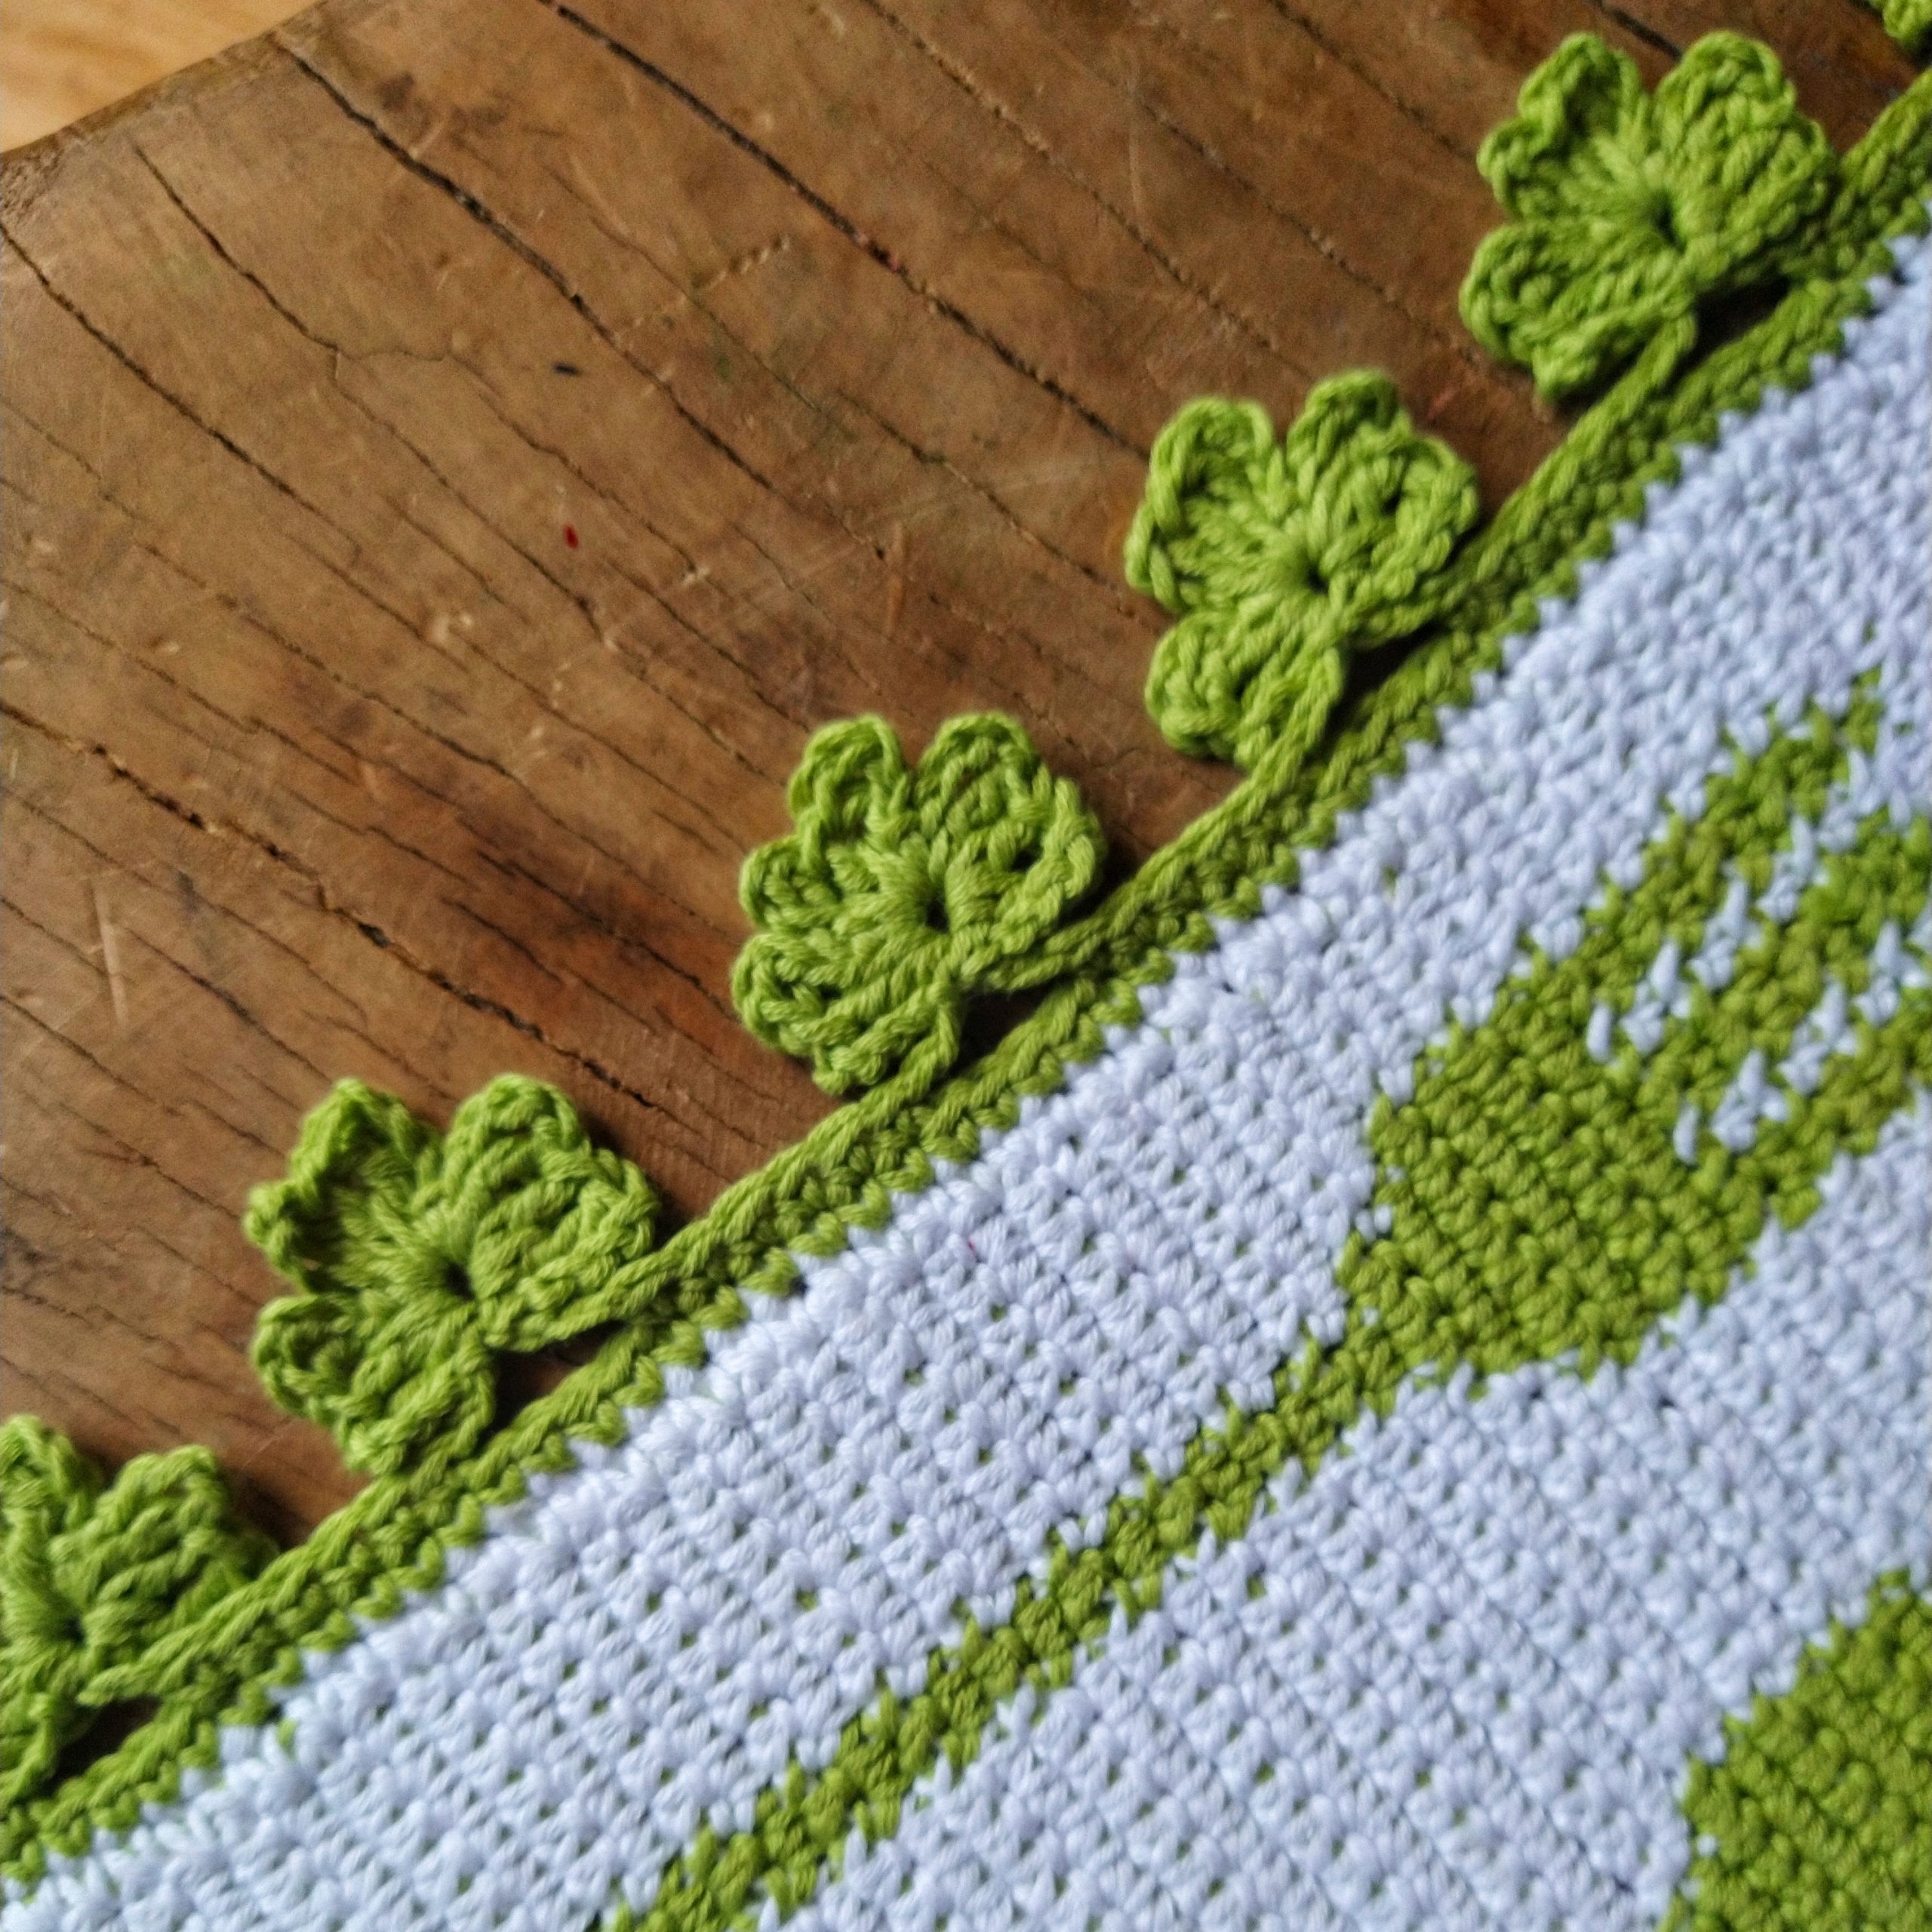
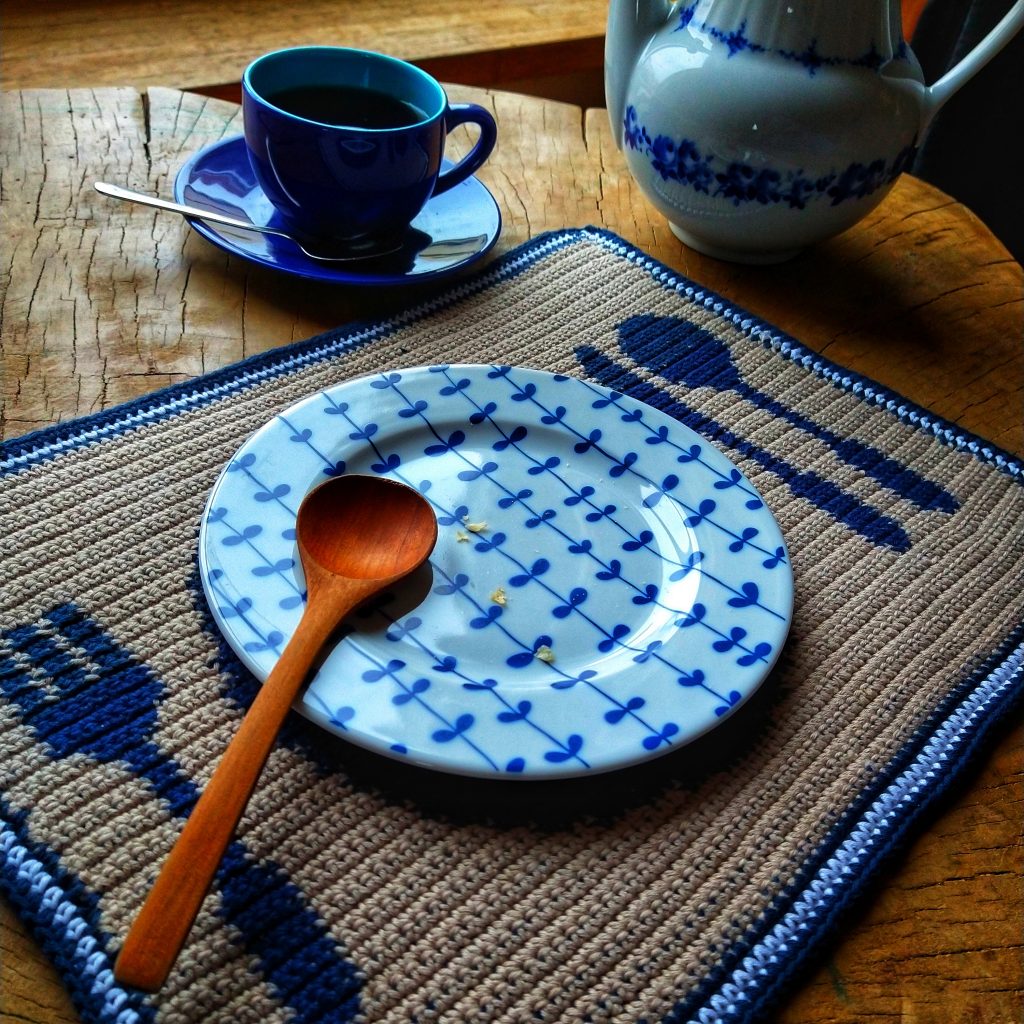
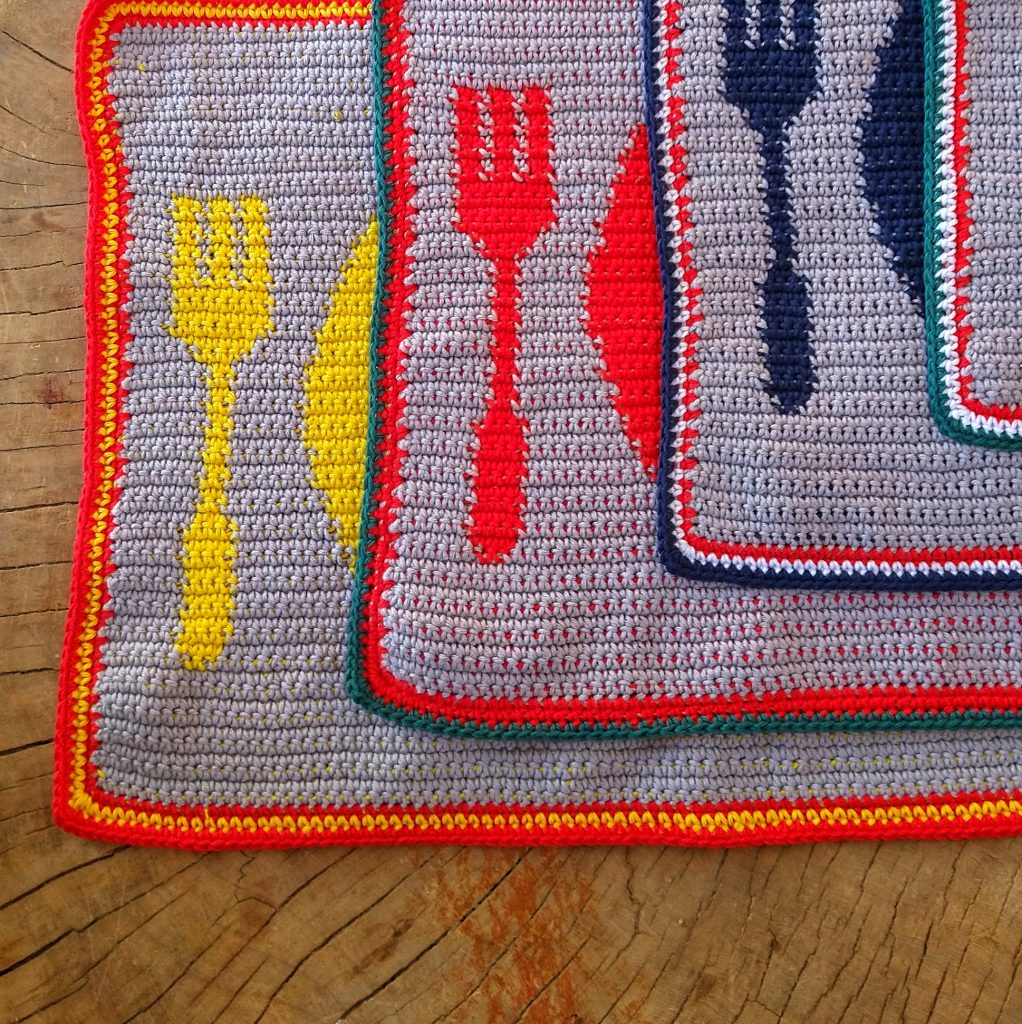
Think of other color combinations. Use your yarn leftovers to customize each placemat with different frame. Why not refer to national flags of your guests, or favourite holiday destinations? Stay tuned and follow me on my blog and social media for future inspiration!
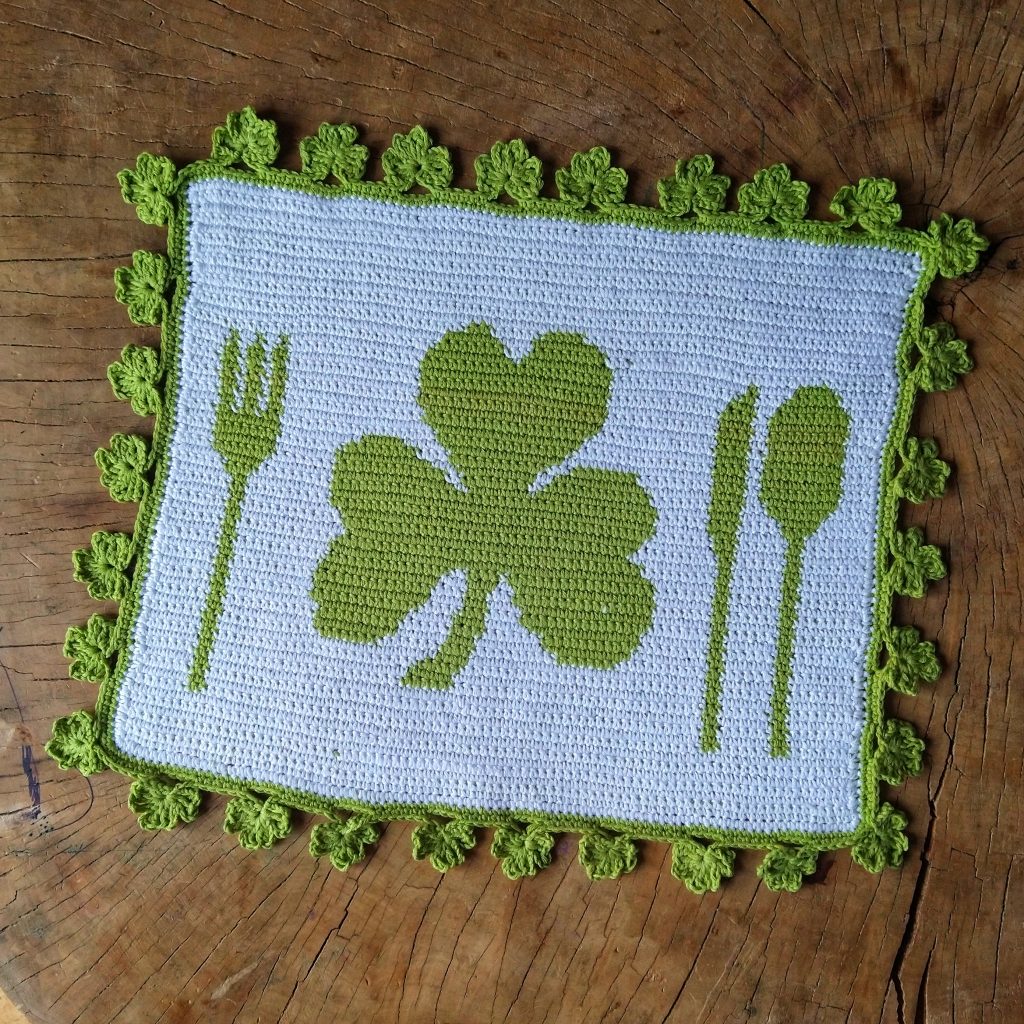
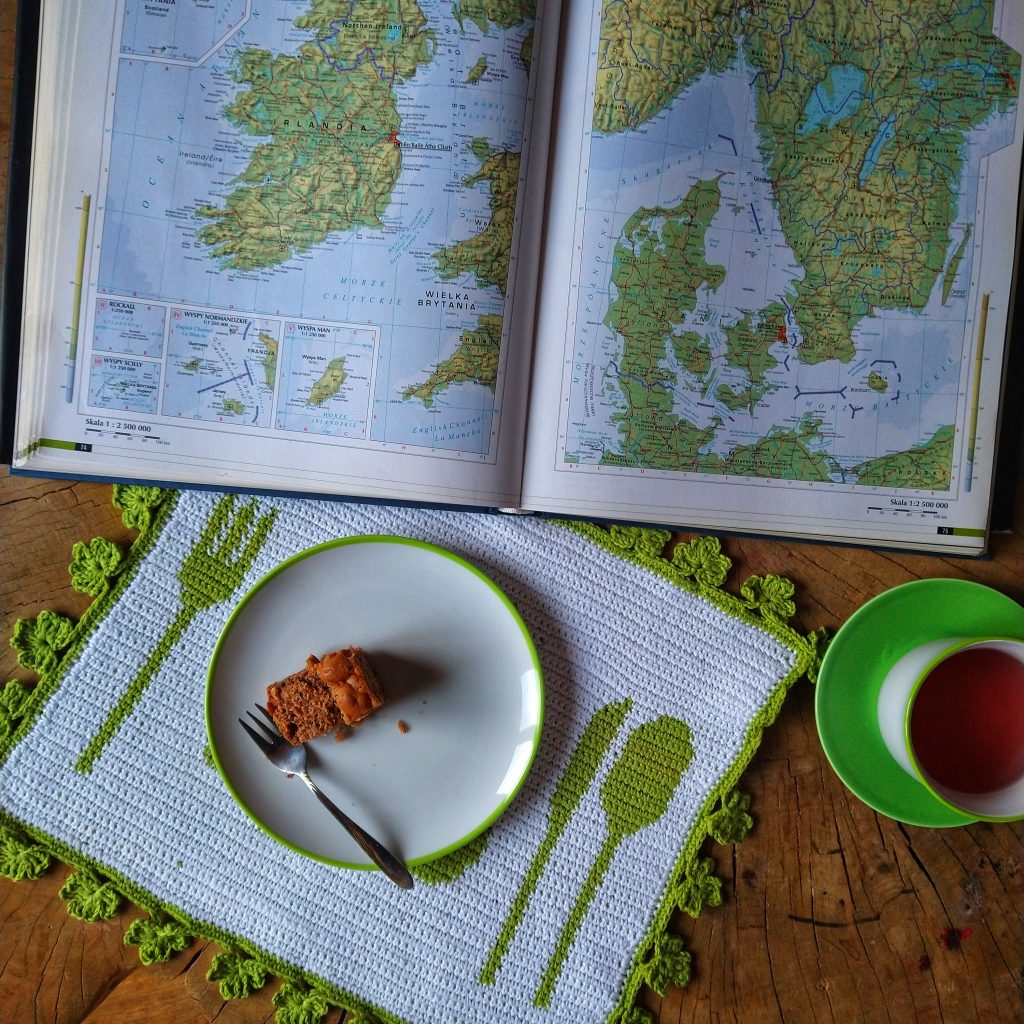
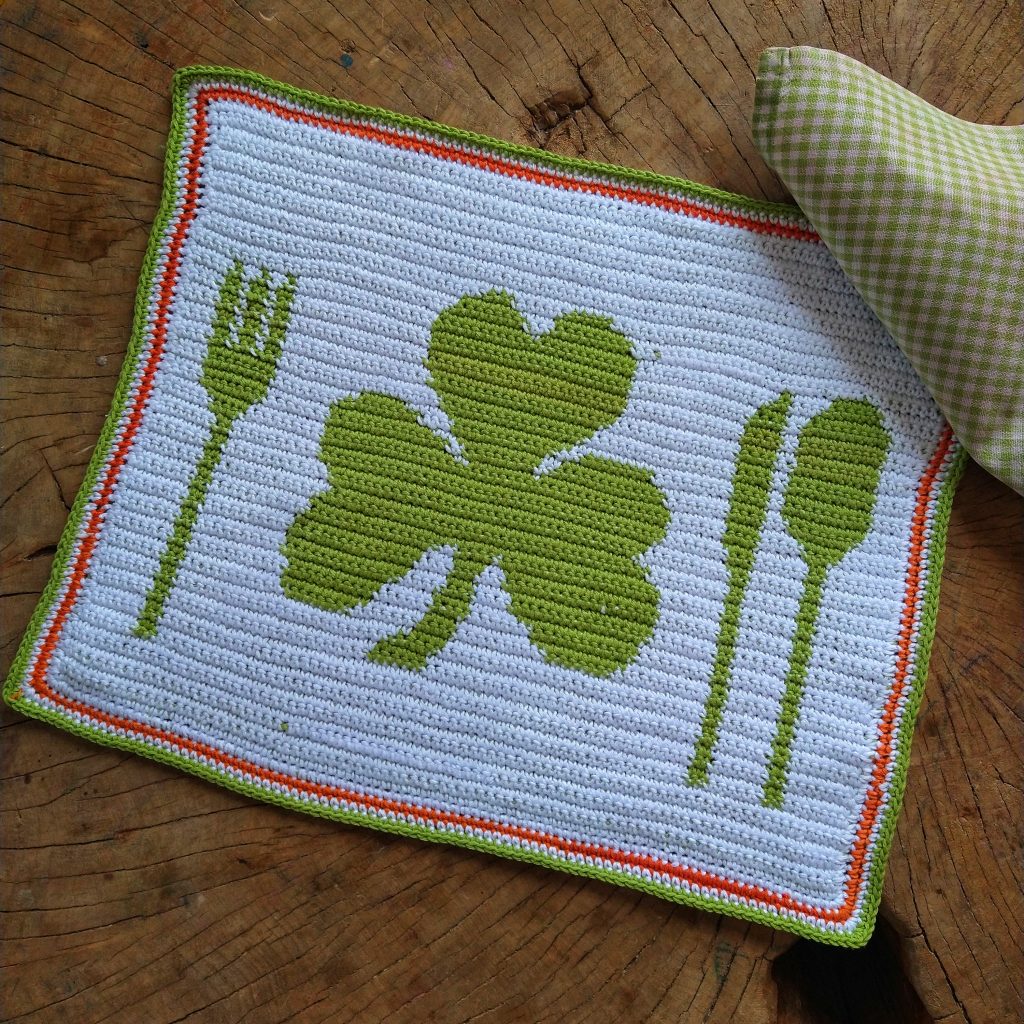
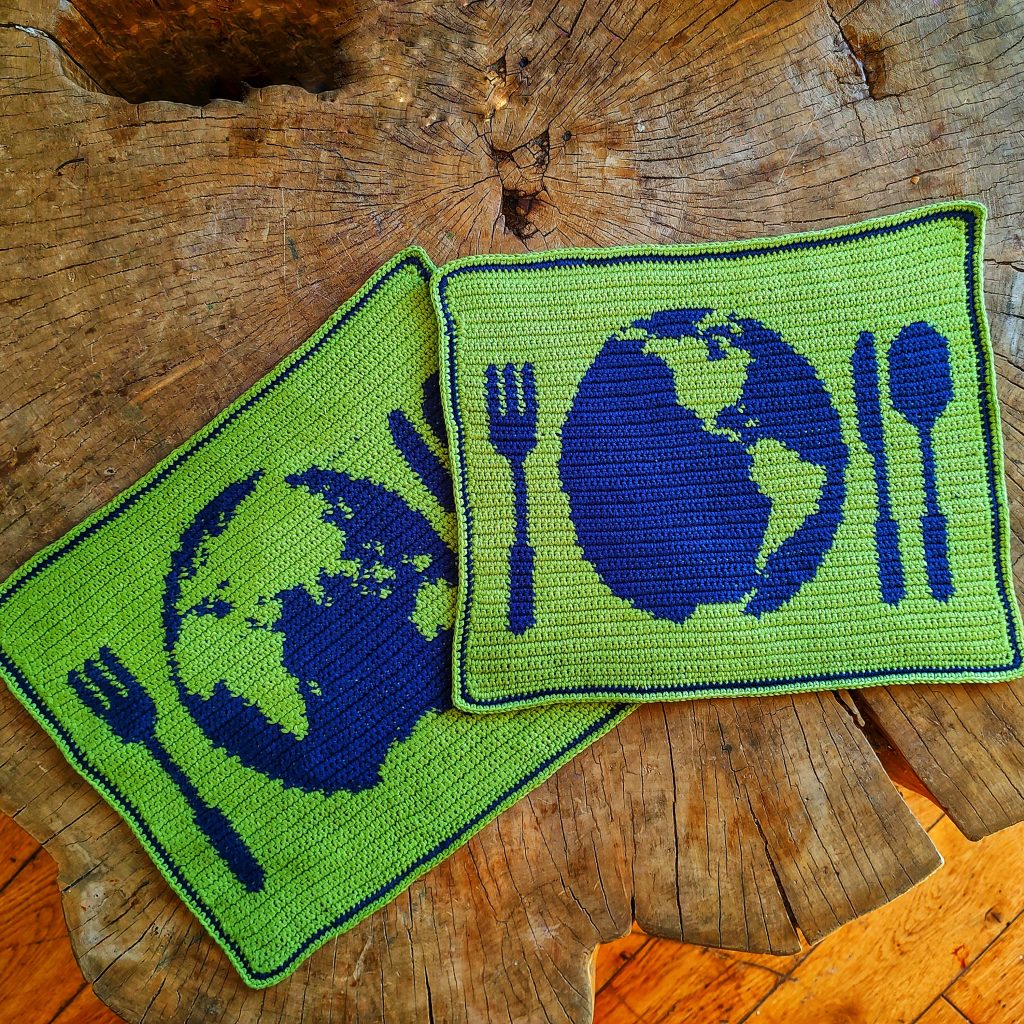
Also see my other design, Eat Green Placemat. Similar to Basic Cutlery Placemat, but with shamrock motif in the midle and all around! You can purchase the pattern HERE.